Are you using XAMPP for your web development projects on macOS but need to change the default htdocs directory to a different location? This can be easily accomplished by following a few simple steps. In this blog post, we will guide you through the process of changing the htdocs directory outside of XAMPPfiles in macOS using the XAMPP application.

First, create a new directory where you want to move your htdocs files. For example, let’s say your new directory is located at “/Volumes/Extra HD/xampp/htdocs”. You can choose any location that suits your needs.
Next, copy all the files and folders from the default htdocs directory at “/Applications/XAMPP/xamppfiles/htdocs” to your newly created directory. This step ensures that all your existing web files are transferred to the new location.

Open the file “/Applications/XAMPP/xamppfiles/etc/httpd.conf” in a text editor. Look for the line that begins with “DocumentRoot” and change it to the path of your new directory. In this case, it should be:
DocumentRoot "/Volumes/Extra HD/xampp/htdocs"
<Directory "/Volumes/Extra HD/xampp/htdocs">
Save the changes to the file.

While still in the “httpd.conf” file, locate the section for virtual hosts. Uncomment the line that includes “etc/extra/httpd-vhosts.conf”. Change it from:
#Include etc/extra/httpd-vhosts.conf
to:
Include etc/extra/httpd-vhosts.conf
Save the changes to the file.

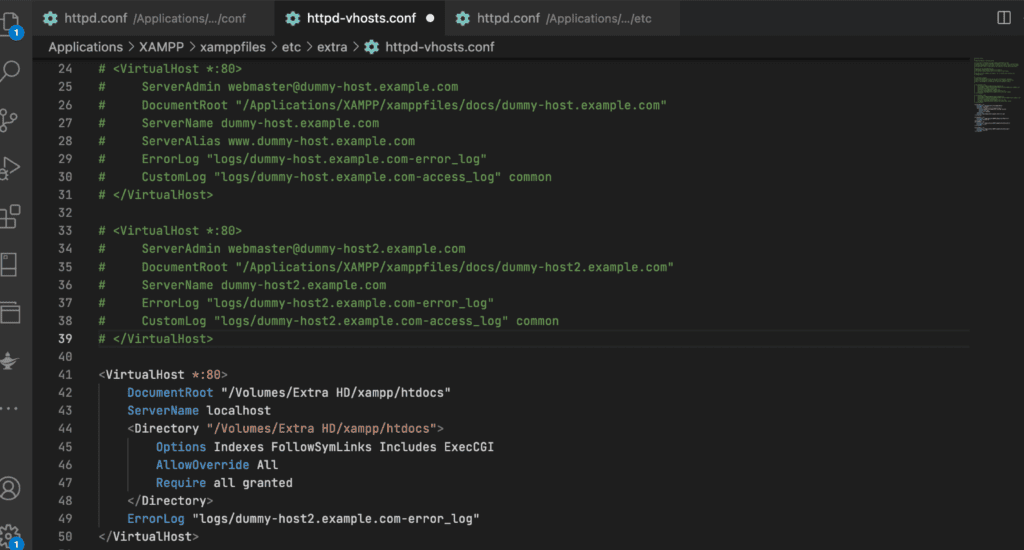
Open the file “/Applications/XAMPP/xamppfiles/etc/extra/httpd-vhosts.conf” in a text editor. After the existing comments, add the following code:
<VirtualHost *:80>
    DocumentRoot "/Volumes/Extra HD/xampp/htdocs"
    ServerName localhost
    <Directory "/Volumes/Extra HD/xampp/htdocs">
        Options Indexes FollowSymLinks Includes ExecCGI
        AllowOverride All
        Require all granted
    </Directory>
    ErrorLog "logs/dummy-host2.example.com-error_log"
</VirtualHost>
Save the changes to the file.

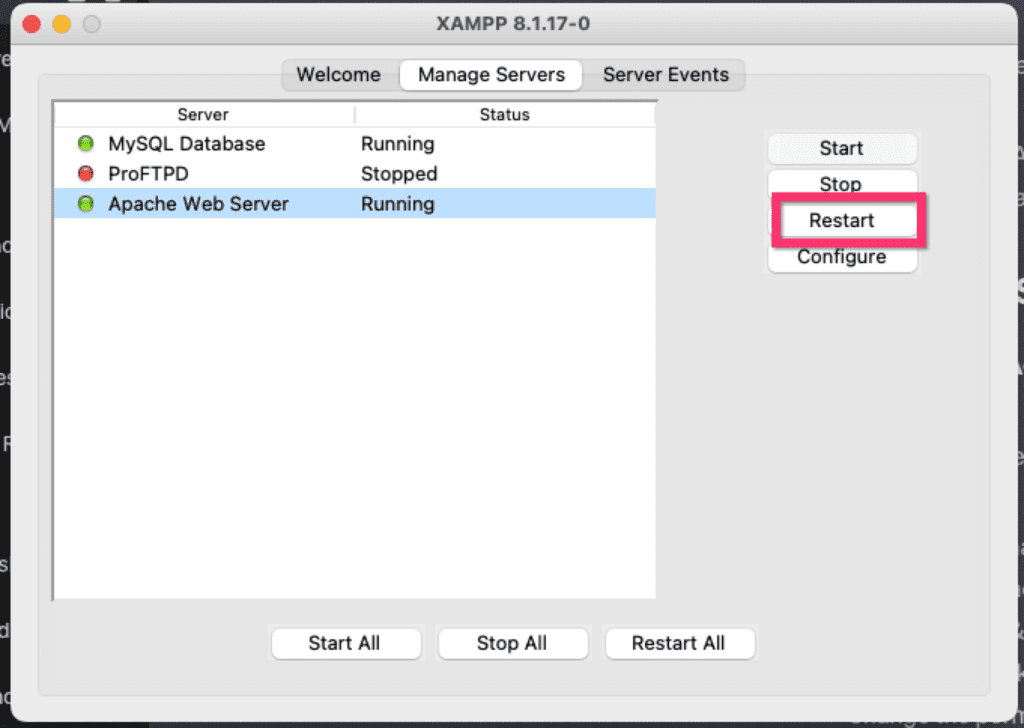
Now, restart the Apache server in XAMPP to apply the configuration changes. You can do this by stopping and starting the server from the XAMPP control panel.


Congratulations! You have successfully changed the htdocs directory outside of XAMPPfiles in macOS using the XAMPP application. Your web development files will now be served from the new location.
We hope this step-by-step guide has been helpful to you. If you have any further questions or encounter any issues, please let us know in the comments below. Happy coding!
Please note that this might change later when Xampp releases new updates. This post is published on Xampp 8.1.17 Rev.0. You can always reach out for more assistance!